Many years ago at a women’s retreat, we all made a craft using 2 ft x 2 ft acoustic ceiling tiles. We painted each tile to match a child’s room, our kitchen, or a bedroom, and we attached a cord on the back to hang it up on the wall.

I ended up making one for my kitchen for my to do items and prayer cards. I made one for Nathan’s room complete with a big N on it and attached rope to the back to hang it on the wall since he had a cowboy-themed room. I also made one for Christmas to pin all of our Christmas cards on every year.
Nathan outgrew his cowboy days, my kitchen one became outdated, and my Christmas one ended up breaking two years in a row so they all ended up going away for one reason or another.
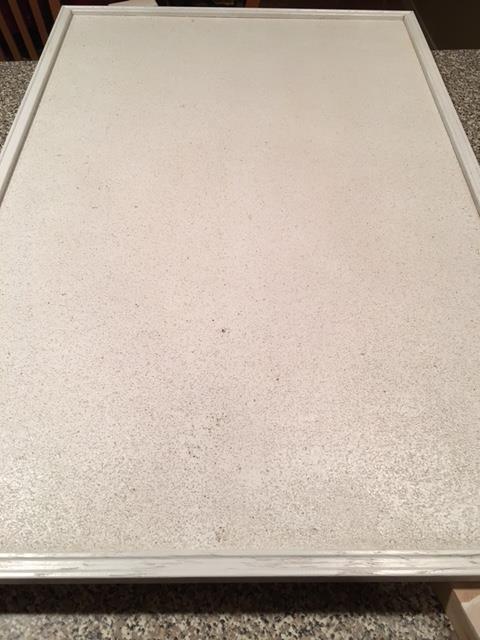
When Nathan decided the other day that he no longer wanted his plain old brown corkboard, I started to put it in the donate bin. Then, I remembered the project I did so many years back. I decided I wanted to use it in my new computer room which I acquired this summer when Madison moved out.
Here is what I did.
I sprayed the corkboard with white spray paint and let it dry for a few hours.
I knew I wanted to do a cross on it since I will be using it in the room where I will be doing all of my blogging. The Cross Eyed Blog needs a corkboard with a cross on it, right?
I measured the length and the width of my corkboard. I then visually decided how long and how wide I would like for my cross to be. Use your measuring tape to measure the length and the width you are thinking about. Does it look right? Is it visually too big or too small?
When I determined how big I wanted my cross, I measured in from the sides an equal amount and taped off the edges of the cross using painter’s tape. For example, I measured 10 inches in from my top edge and 10 inches in from my bottom edge to make sure my cross was centered on the corkboard.
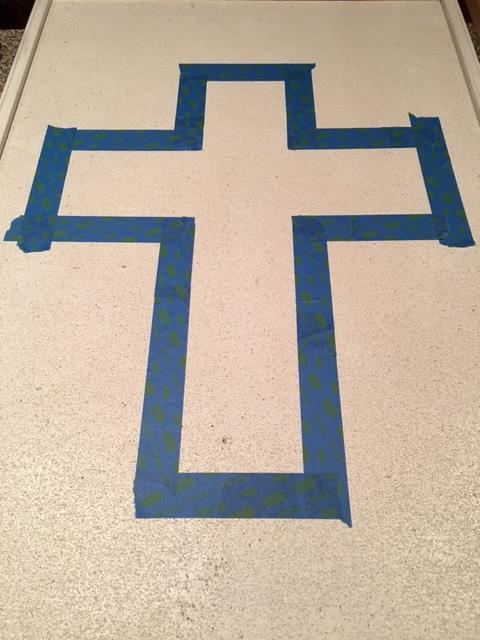
Make sure your tape is level and plumb by making sure the measurements are the same on the left side as well as the right side of your tape. For example, I would measure 10 inches in from the left side and tape, and then measure 10 inches in on the right side and tape. I need to make sure my taping strip maintains that 10 inch measurement all the way up and down in order for the line to be straight.
If you want to avoid these measuring steps and get a stencil at a craft store, you can do that too. They have lots of choices such as sayings or letters to spell out a child’s name. There are even vinyl stencils which may work. You would need to check and see if it worked on cork or not.
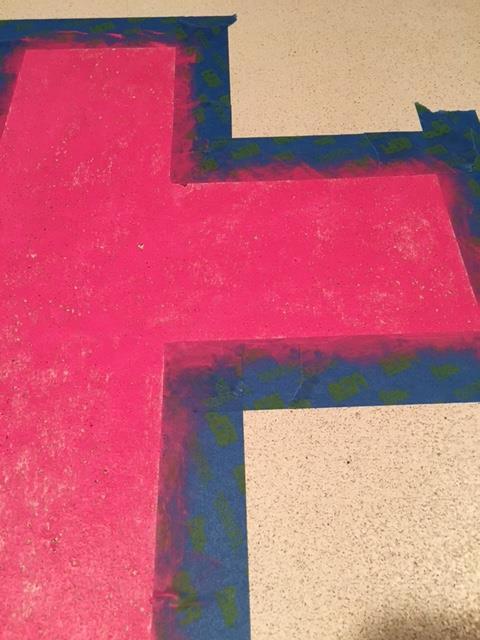
When everything is taped off and looks good, fill in the center of the cross with craft paint using a foam stencil brush or regular foam brush. Stipple or use paint strokes pushing away from the tape edge to make sure no paint oozes under the tape. This would give you a messy tape line.
Use upholstery tacks on all the corners. Upholstery tacks are super inexpensive ($1-$2) and usually come in white, silver and black.

Your imagination is the limit with this project. You can customize it to fit any room. This would make an inexpensive Christmas gift for any kiddo on your Christmas list. If you wanted to do it on acoustic ceiling tiles, they are super inexpensive too. The whole project really would set you back less than $10 per corkboard.
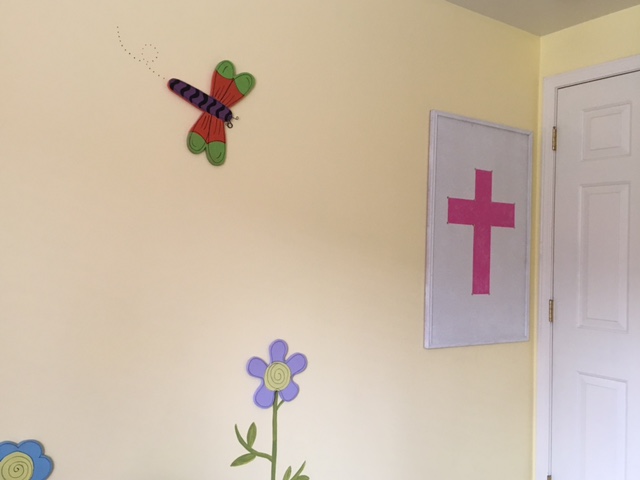
I also like to hang corkboards behind a door so that when you come in the room, you don’t see the mess of what is sometimes on a corkboard, especially in a kid’s room. This tip will make your room look neater to hide your board behind the door.